Rainwater Harvesting In 7 Easy Steps!
Rainwater harvesting systems have become part of “Going Green”. While solar panels and geothermal systems can cost tens of thousands of dollars, rainwater harvesting systems are quick and inexpensive for any homeowner to build. And rainwater harvesting systems can help drastically reduce the use of precious resources!
The EPA estimates that over 40 percent of typical household water usage during the summer months comes from keeping gardens and lawns green. For under $50 dollars, we are going to make a rainwater harvesting system (with rain barrel) that will save you over 1,000 gallons of water per year. And you will only need 7 tools to begin your very own rainwater harvesting!
Rain Harvesting Tools Needed:
- Drill
- Hole Saw (4” & 7/8”)
- Measuring Tape
- File
- Nail
- Hammer
- Caulk Gun
Items Needed:
- 55 Gallon Drum: $10.00
- ¾” Hose Fitting (Male): $6.52
- ¾” 90 Degree Elbow for Overflow: $.91
- ¾” Threaded Adapter for Overflow: $.32
- Flex-elbow downspout: $2.39
- 3” to 4” Soil Pipe Hub: $6.16
- ¾”x 2FT Pvc pipe: $2.30
- (2) Cans Spray Paint: $8.96
- Tube Caulk: $4.24
Total Cost: $41.80
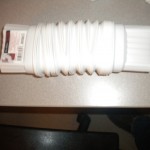
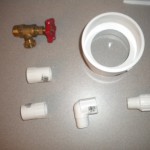
Pictured Above: Barrel, ¾ Hose Fitting, Flex-elbow Downspout, 3” to 4” Soil Pipe Hub, ¾” 90 Degree elbow for Overflow & ¾” Threaded adapter for overflow
 Harvesting Step 1: Prep Your Rain Barrel
Take your 55 gallon drum and begin to prep the barrel by washing it clean of any residue. It is important to clean the inside of what will become your rain barrel very thoroughly, especially if there were any toxic substances store in it previously.
 Harvesting Step 2: Cut Hole for Downspout
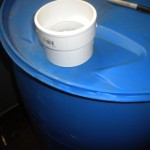
There are two screw-off caps on the top of your barrel. Choose one of these caps that you would like to use for your downspout hole. We picked the front cap because it worked the best with the way the downspout was coming off the house where this rainwater harvesting system would eventually be installed.
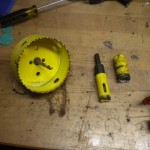 Next, take your 4” hole saw and seat it directly on your cap of choice and begin to drill out that cap. You will notice it might take a few minutes as these barrels are quite thick.
 Once you have your hole drilled, take your 3” to 4” soil pipe hub and stick it in your newly created hole.
Harvesting Step 3: Cut Rain Barrel for Hose Fitting
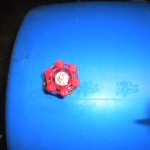
Take your rain barrel and turn it on its side. Measure 2.5 inches from the bottom of the barrel, then take your hammer and nail and make a slight indent. This will be your starting point for your hole saw. Take your 7/8” hole saw as pictured below and line it right over your indent. If you have an extra set of hands it might be a good idea to call them over to hold the rain barrel so it doesn’t slip or shift while cutting. If no one is around, be sure to lean your knee against the barrel to hold it tight. Once you are done drilling you will have a nice hole just like the one to the right.
 Harvesting Step 4: Place the Fitting
Now that your hole is drilled, take your ¾” hose fitting and line it up with the hole you had drilled in the rain barrel. You might notice that this hose fitting isn’t going to fit in the hole you just drilled. No worries … that is why we have the file. Take your file and gently file around the hole three times. We want the hose fitting to fit very snug within the barrel so it will not leak. Take your hose fitting and begin to spin it clockwise into your drilled hole. You will notice that it will start to thread itself through.
Harvesting Step 5: Cut Overflow Hole & Place Fitting
Turn the rain barrel back on its side and mark 2 inches down from the top of the barrel for the hole of your overflow port. Doing the same thing as you did with the ¾” hose fitting, take your hammer and nail and make a slight indent. Just as you did in Step 2, take your 7/8” hole saw and place it over the indent and begin to drill the hole. Once you have the opening drilled take your file and lightly file around the hole to open it up a bit more. Lastly, take your ¾” 90 degree elbow and begin to thread it through. Attach your ¾ threaded-adapter and configure your PVC piping to flow away from the foundation of your house.
Harvesting Step 6: Seal the Deal
Take your tube of silicon and apply around each of the fittings to assure that there will not be any leaks. Let that silicon set and dry so the bond is strong.
Harvesting Step 7: Paint Rain Barrel (Optional)
Now you might be happy with the way your barrel looks. This particular rainwater harvesting system will be connected to the downspout in the front of a house so we wanted it to blend in a bit. Home Depot has a spray paint made especially for plastics called “Specialty Plastic”. We purchased 2 cans for $8.96 and gave the rain barrel and PVC a paint job. You will need two coats as the paint seeps in the barrel.
 Harvesting Step 8: Install Rain Barrel
Start by figuring out which downspout on your home you would like to act as the rainwater harvesting system. Place two cinder blocks on the ground for your rain barrel to sit on. Next, place your rain barrel on top of the cinder blocks. Take your plastic downspout extender and line it up on your gutter. Using a hacksaw or tin snips cut the downspout where you had lined up your extender. Fix the downspout extender to the existing gutter on the hose and direct the downspout extender into the 3” to 4” soil pipe.
And I highly recommend that you consider installing quality gutter protection before building your rainwater harvesting system. The last thing you want inside your rain barrel is a bunch of debris.
